About Us
Lofty Ideas » How to install a loft ladder
If you are looking to gain access to your loft and make it a usable space the easiest way of doing this is to install a loft ladder. The Loft Shop provide a great many types of loft ladders from the less expensive Spacemaker and Easiway ladders right up to made to the Concertina range. Loft Shop even supply top quality electric loft ladders
However the best selling Loft Ladders at The Loft Shop are the Wooden 3 section ladders. The reason for this is that they come complete with ladder and hatch, and are at least 940 x 600mm in size which means you will be able to carry most bulky items that you might have for storage straight into your loft area!
Before you begin
Again, with this type of work it is always sensible to try and undertake it with 2 people.
Please read through the instructions enclosed in the product very carefully and ensure that you have carefully placed all fixings within easy reach of each other. For this job you will need some of the tools listed below:
 |
 |
 |
|
Tape Measure |
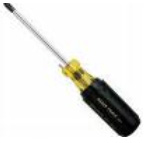
Hammer | Screwdriver |
|
||
 |
 |
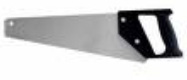 |
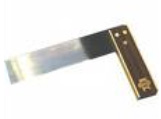
| Sqaure | Pencils | Panel Saw |
|
||
 |
 |
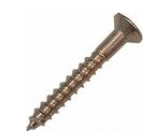 |
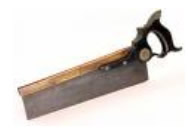
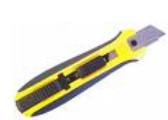
| Tenon Saw | Craft Knife | 50mm x No. 10 wood screws |
|
||
 |
 |
 |
| 50mm oval wire nails | 25 mm Panel pins | Cordless Drill |
…So, you’ve got your tools, it’s a dry day, and your ready to go!
Step by Step
1. Choosing the location for the loft ladderNote: Most of the time you may be able to alter an existing opening, but occasionally you will need to choose a new location. Do not make the opening too close to the external wall of the house. To avoid problems with headroom position the opening not less than 1 meter from the external wall. Before beginning work – check that sufficient headroom is available to allow you to enter the loft space at the chosen position. |
 |
2. Making a new opening in the ceilingMark the position of the opening for your loft ladder on the ceiling. Make a trial hole (in the centre of the marked opening) and cut a small section of plasterboard. The ladder should be installed running in the direction of the joists, and not against. Check the position of the ceiling joists and adjust the position of the new opening to coincide with a joist. (In traditional house construction, the ceiling joists are likely to be 100 x 50mm at approximately 400mm centres. Mark and cut the ceiling joists to the length of the loft ladder plus 100mm equal to the thickness of two trimmers. Insert and nail a trimmer at each end or side to form a rectangular opening of the required size. The trimmers should be the same size as the existing ceiling joists. Check for squareness and cut the remaining plasterboard to the correct opening size. Nail the plasterboard or laths to the new trimmers. WARNING! If your house has lathe and plaster ceilings you must take extra care in cutting the laths. Use a small tennon saw or fine blade pad – saw and support the plaster while cutting the laths.
|
|
3. Altering an existing openingIt is more common that you will already have a loft hatch. This is likely to require altering – usually by being enlarged. Check the position of the ceiling joists and any obstruction in the roof before deciding to make the opening. Remember that the ladder must be installed running along the joists and not across. Common obstructions in the loft may include the water tank, or an area where you might not be able to stand up when entering the loft space. Mark the dimensions of the opening on the ceiling. Cut the ceiling joists, insert and nail trimmers as necessary and as described before and proceed as for new opening. Check for squareness and complete as before. You are now ready to install your loft ladder. |
 |
4. Fitting support battens to the box frameMeasure the overall depth X of the ceiling joists, plaster and boarding (if installed). Mark the dimension X on all 4 sides of the box frame. Nail or screw a length of 50 x 25mm sawn batten along each side with the bottom edge level with the marks. These battens are used to locate the box frame in the ceiling opening and must be firmly fixed. The battens can remain or be removed at a later stage if required Mark the dimensions of the opening on the ceiling. Cut the ceiling joists, insert and nail trimmers as necessary and as described before and proceed as for new opening. Check for squareness and complete as before. You are now ready to install your loft ladder. |
 |
5. Installing the loft ladder into the openingYour assistant can now lift the ladder assembly up to you through the ceiling opening. Locate the ladder assembly squarely in the ceiling opening so that it is supported by the battens nailed to the sides. Ask your assistant to check that the box frame is flush with the ceiling around the opening. If not, adjust to make level, but remember particularly with old ceilings it may never be exactly flush with the ceiling because the ceiling may be out of sink. The best way to check that it is level is to put a spirit level on a tread. WARNING! Check the ladder will open in the correct direction for ascent when installed! |
 |
6. Fixing the box frameThe box frame must now be fixed permanently into the opening. Drill holes in the ends and sides of the box frame. Two holes in each short side and three in each long side will be adequate. Countersink the holes and fix the box frame with steel or brass 50mm x No.10 wood screws. Alternatively the box can be nailed to the ceiling joists with 50mm oval wire nails. |
|
7. Cutting timber ladders to the correct heightThe three section timber ladders (when open) will suit floor to ceiling heights of 2300mm – 2800mm. As pictured opposite it is relatively simple to ensure you cut the last section to the correct height. The best way of ensuring that this is correct is to pull the ladder down and tuck the last section back underneath as shown in the picture above. Dimensions A and B can them be measured usually by putting the rule parallel to the top (A) and Bottom (B) of the strings. |
 |
8. Completing the work!Apply mitred architrave around the edge of the box and frame and fix to the frame with 25mm panel pins. Glue the corners if necessary. Punch the nail heads below the surface of the trim. Use coloured filler to match the timber when staining or polishing. |
|