About Us
Lofty Ideas » How to install a roof window
- Are you looking to add light to your loft in the least expensive way possible?
- Are you looking to convert that unused attic space into a useable area?
If the answer is YES to this, then perhaps you are considering the installation of a roof window!
Usually the first question that people ask is whether it is easy to install a roof window! Installing roof windows can be easy as long as you are prepared, and have the correct tools and know how.
For Lofty Ideas this month, we are going to show you how to install a roof window, and what you need to be really prepared.
All roof windows come with full step-by-step instructions, which have been carefully prepared and tested to make your work as easy and safe as possible.
Your roof will most likely be constructed with slates on battens, supported by rafters. It may also have felt under the battens and in some cases the roof could be close boarded.
Whichever of these methods of construction is used the basic principles of making the new opening in the roof are the same. The Loft Shop recommends certainly with the larger sizes of roof window that you have assistance, at least as a safety precaution, to help with the installation.
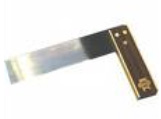
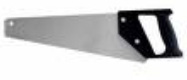
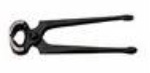
You will require the following tools for the installation of your roof window:
 |
 |
 |
| Tape Measure | Hammer | Work Gloves |
|
||
 |
 |
 |
| Sqaure | Pencils | Angle Grinder |
|
||
 |
 |
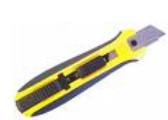 |
| Panel Saw | Pincers | Craft Knife |
|
||
 |
 |
 |
| Screwdriver | Safety Goggles | And of course your fitting instructions! |
…So, you’ve got your tools, it’s a dry day, and your ready to go!
Step by Step
|
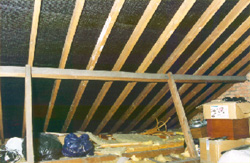
1. The attic before work has begun. A dark and dusty space used simply for storing junk!
|
 |
| 2. First mark on the rafters the approximate position required for your new roof window. Mark the centre of the window and remove an area of felt (and/ or boarding) to expose the tile or slate roof covering |
 |
| 3. Remove first tile or slate by lifting and pulling it back between the battens. NB At this stage it is worth checking that the area below the roof slope you are working on is cordoned off, and that you have a something stable to stand on– just in case you lose a tile. | 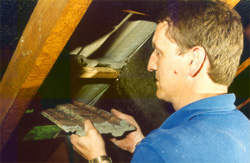 |
| 4. Continue removing tiles or slates until you have a suitable opening for access. Now cut the battens close to the side of the rafters | 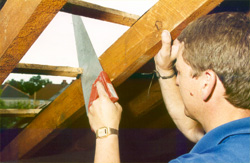 |
| 5. If necessary cut a rafter at the top and bottom and remove it with the battens to make a wider opening. |  |
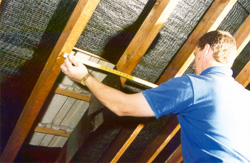
| 6. When removing tiles or slates from the roof remove at least one additional row beyond the actual width up each side of the roof slope to make room for the window flashings. Measure the overall height and mark the top and bottom positions on the rafters. Make sure you use a 90º square otherwise your window will not fit correctly. | 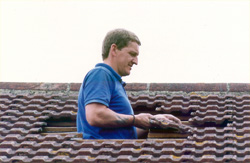 |
| 7. Cut out the rafters to give a clear aperture. Measure the width and height and check the squareness. Mark the position of any trimmers and infill rafters. Insert the lower trimmer and nail securely. Insert the top trimmer and infill rafter if required. Nail securely and check that all surfaces are flush and that the opening is square | 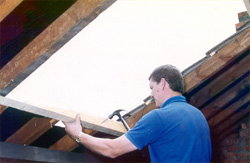 |
| 8. Now take the roof window sash from its frame (the part of the window that moves) To do so, hold the window firmly in an upright position. Unlatch the handle and partly open the window. Remove and throw away any wood packing blocks. Use a screwdriver to loosen the clips where the arms are attached. Remove the cover. Hold the window sash firmly with the black arms out of the way and lift it from the two pivot slots. Keep the sash safely. | 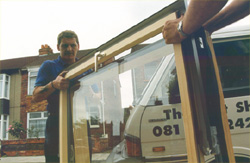 |
| 9. Insert one metal dowel bracket in each of the four corner holes in the frame. Lightly tap the dowel into the hole using a rubber mallet, or hammer if you don’t have one. Keep the brackets square to the frame and hammer in the spiked end. |  |
| 10. Lift the roof window frame into the roof opening and locate so that the metal pins sit on top of the top and bottom battens. When you have checked that the window is sitting squarely in the opening, nail or drill through a slot in each bracket. Do not drive the nail home until you have checked the window is square and level. | 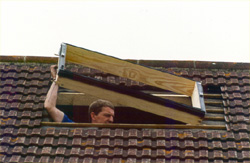 |
| 11. When the window frame is firmly located in position, complete the weatherproofing. Stand in the opening and insert the flashing pieces. Start with the lower flashing. Lift up the black rubber trim and position tight against the frame beneath the rubber Fitting flashings on tiled or slate roofs are different and detailed instructions enclosed with the kit should be followed carefully. | 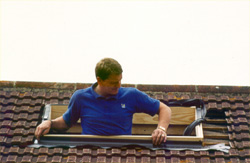 |
| 12. Replace the tiles or slates at the sides of the window. If you need to cut the tiles or slates use an electric angle grinder or a tile cropper and wear gloves and goggles to protect your eyes. | 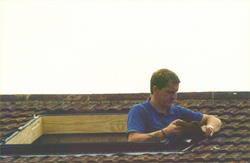 |
| 13. Now refit the sash and top sash cover. Lift the window sash holding it firmly at the top and bottom and pass it through the window opening. Remember – Upside down and back to front! | 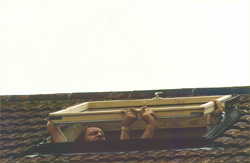 |
| 14. Hold the window and adjust it so that the two pivot mechanisms slide into the channel slot on the frame (again be careful with the arms) once it is located, you will need to re attach the arms at the top of the frame, and push the clips back into place. You are now able to reattach the top sash cover. Check everything is secure before releasing the window. | 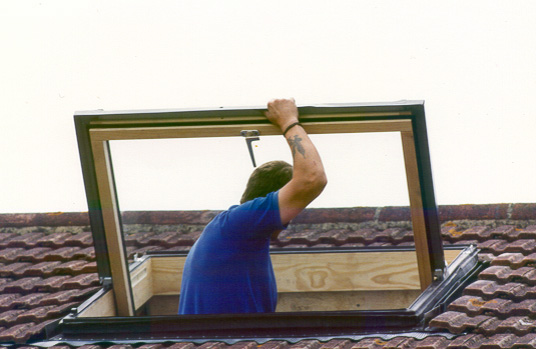 |
| 15. There is an adjustment you can make once the sash has been fitted back into the frame. If the sash is slightly out of square there is an alignment adjustment on the left hand side that can be made with the alum key enclosed with the fixing packs. | 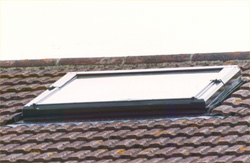 |
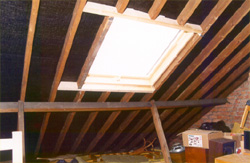
| 16. The attic with a roof window installed. Just adding natural light has already made an enormous difference to the attic space! – Compare it with picture 1 | |
Before |
 After |